Redocly offers almost complete flexibility in information architecture. This website is a demonstration of a common information architecture with a single navbar and multiple sidebars.
The content is meant to be fun and playful, but the information architecture is serious.
Map your content out. A sitemap is different from navigation.
I color code the sitemap to organize the content into logical groupings.
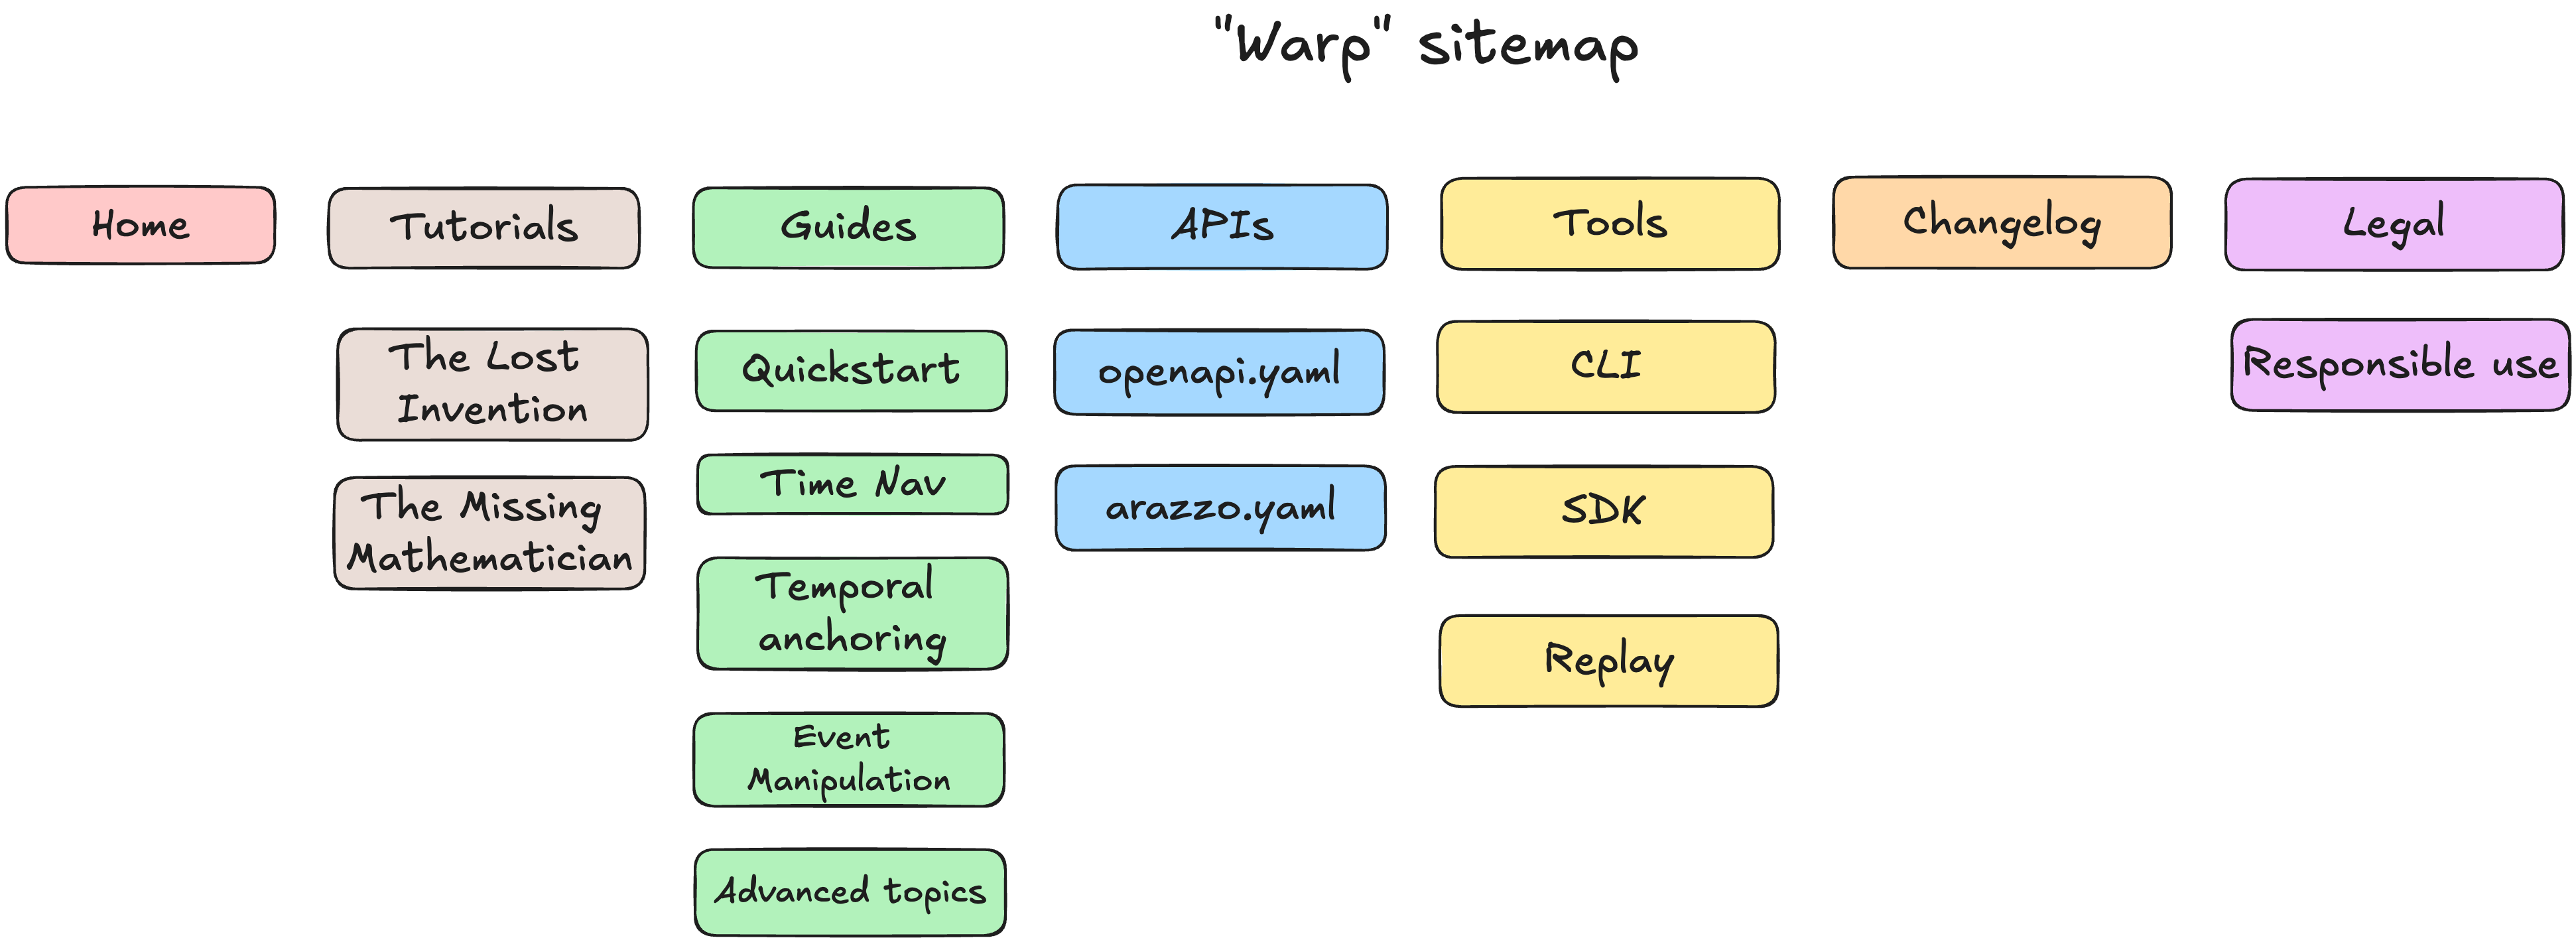
To spare space, I only show the handful of pages in each logical grouping.
Decide how you want to organize your navigation. You can have navbars, sidebars, and footers. Most websites have 1 navbar and 1 footer, but it's not uncommon to have multiple sidebars. In some exceptions for multi-product website, they have multiple navbars.
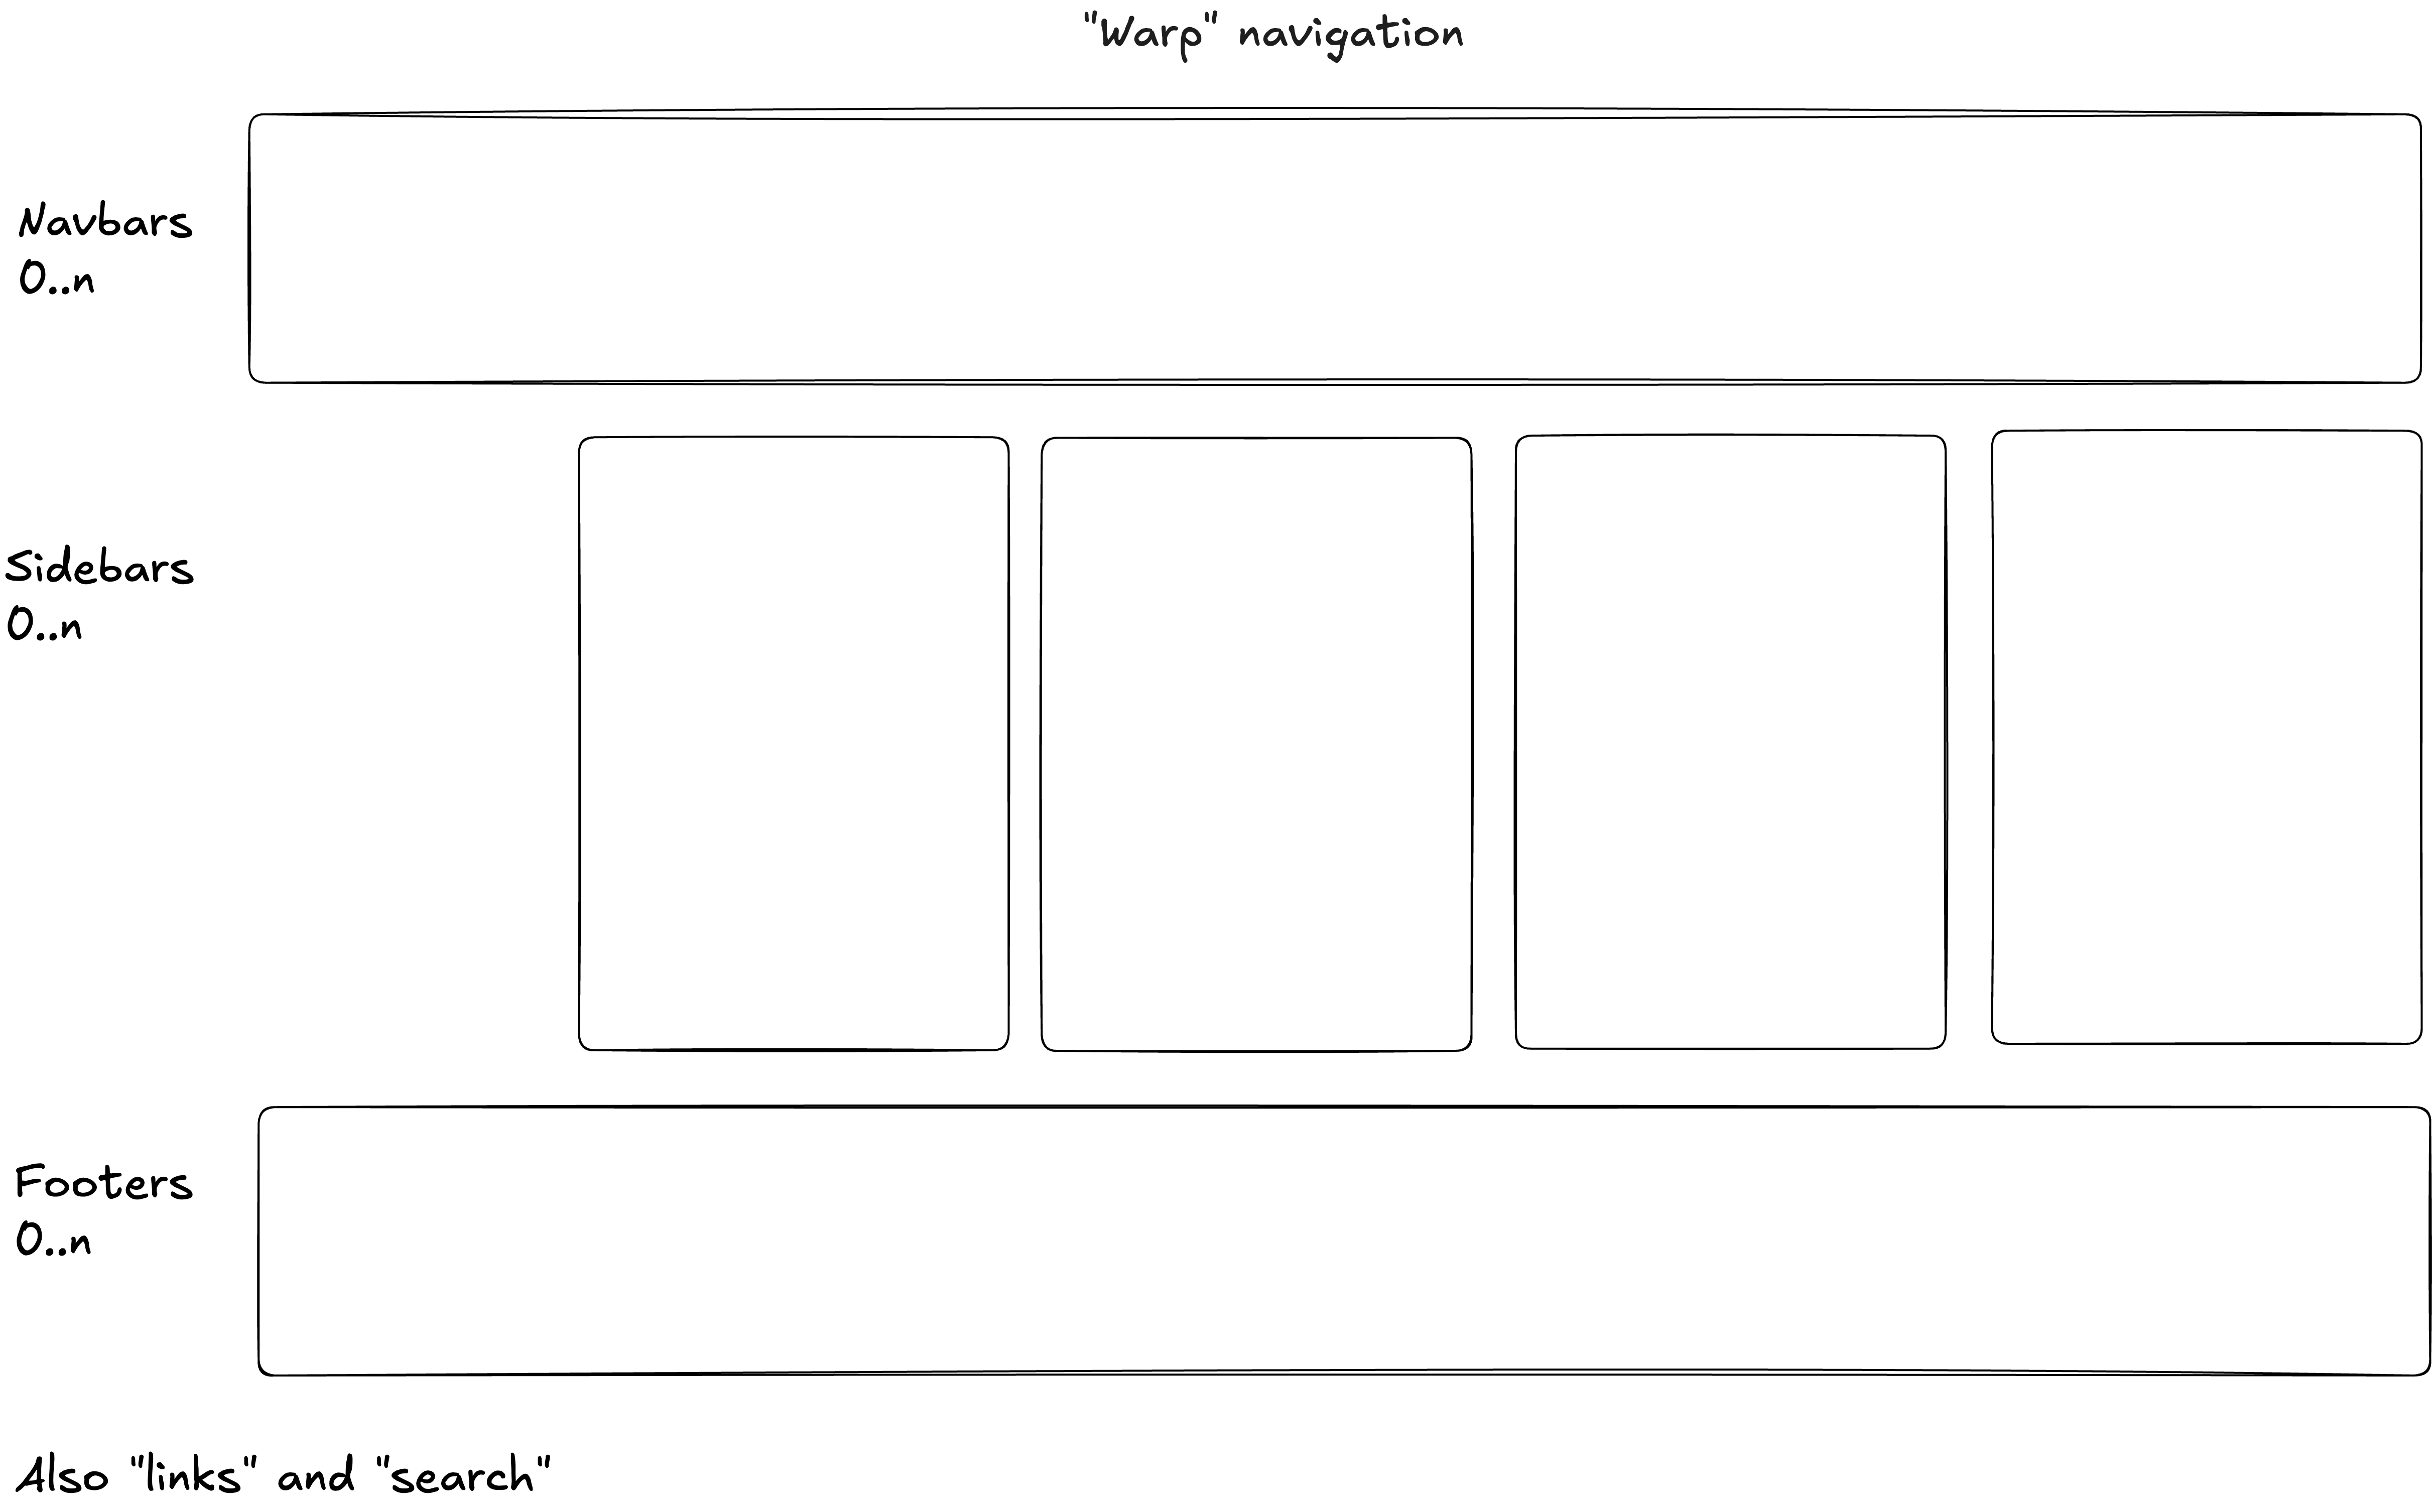
I decided this site would have 1 navbar, 1 footer, and multiple sidebars. I decided a few pages shouldn't have sidebars such as the home page, the changelog, and the legal pages.
However, I could have easily added a sidebar to any of those pages by adding the file to the appropriate sidebars.yaml file.
A project with multiple sidebars would have multiple sidebars.yaml files (with that exact name but located in different folders). They can be organized into folders as appropriate (you can see how I organized my project).
The source is available on GitHub.
A project with a single sidebar is also available on GitHub at the Warp Single-sidebar template.
├──@theme
│   ├──Templates
│   │   └──StepByStep.tsx
│   ├──components
│   │   └──CardWithCode
│   │       └──CardWithCode.tsx
│   ├──markdoc
│   │   ├──components.tsx
│   │   └──schema.ts
│   └──styles.css
├──about.md
├──apis
│   ├──arazzo.yaml
│   └──index.yaml
├──changelog.md
├──guides
│   ├──advanced-topics
│   │   ├──automated-event-manipulation.md
│   │   ├──case-studies-advanced-manipulation.md
│   │   ├──complex-paradox-resolution.md
│   │   ├──custom-extensions-plugins.md
│   │   ├──high-precision-temporal-anchoring.md
│   │   ├──index.md
│   │   ├──multi-timeline-management.md
│   │   ├──security-in-time-travel.md
│   │   ├──temporal-data-management.md
│   │   ├──temporal-ethics-best-practices.md
│   │   └──temporal-mechanics.md
│   ├──event-manipulation.md
│   ├──index.md
│   ├──quickstart.md
│   ├──sidebars.yaml
│   ├──temporal-anchoring.md
│   └──time-navigation.md
├──images
│   ├──background.svg
│   ├──grid-dark.svg
│   ├──grid.svg
│   ├──logo.svg
│   ├──navigation.png
│   └──sitemap.png
├──index.page.tsx
├──legal
│   ├──responsible-use.md
│   └──terms.md
├──package-lock.json
├──package.json
├──redocly.yaml
├──tools
│   ├──cli.md
│   ├──index.md
│   ├──replay.md
│   ├──sdks.md
│   └──sidebars.yaml
└──tutorials
├──index.md
├──lost-invention.md
├──missing-mathematician.md
└──sidebars.yamlThe home page is the first page that visitors see. It is the most important page.
While I usually start with a draft, I often complete the home page last.
The home page can have a hero section, a features section, a benefits section, and a call to action.
In addition, the home page can have a navbar, a footer, and a sidebar. However, many times people choose not to have a sidebar on the home page.
I start my home page in Markdown because it's easy to write. Then, I add in the fancier components and design flourishes last.
The same concept applies to any landing page, not just the home page.